-
Products & Solutions TopProducts & Solutions

-
 Products & Solutions Top
-
Drives & Controls
-
UPS & Industrial Power Supply
-
Sensors & Measurements
-
Energy Management
-
Monitoring & Control System
-
Distributions & Controls
-
Transmission & Distribution
-
Transit System
-
Semiconductors
-
Energy
-
Food and Beverage Distribution
-
Service & Equipment Upgrades
-
Solutions
-
-
IR TopInvestor Relations
"Screen No. Error"
"Screen No. Error"
- Category :
-
- GLOBAL > HMI > V10/V9 series > Error
Answer
This error occurs when using a V8 compatible setting (*) on a V10/V9 series unit.
At the start of communication, the V10/V9 series initially displays the screen corresponding to the value specified for "n+2" in [Read Area].
"Screen No. Error" is displayed when the screen number entered for "n+2" in [Read Area] does not exist in the screen program.
* Procedure for checking V8 compatible settings:
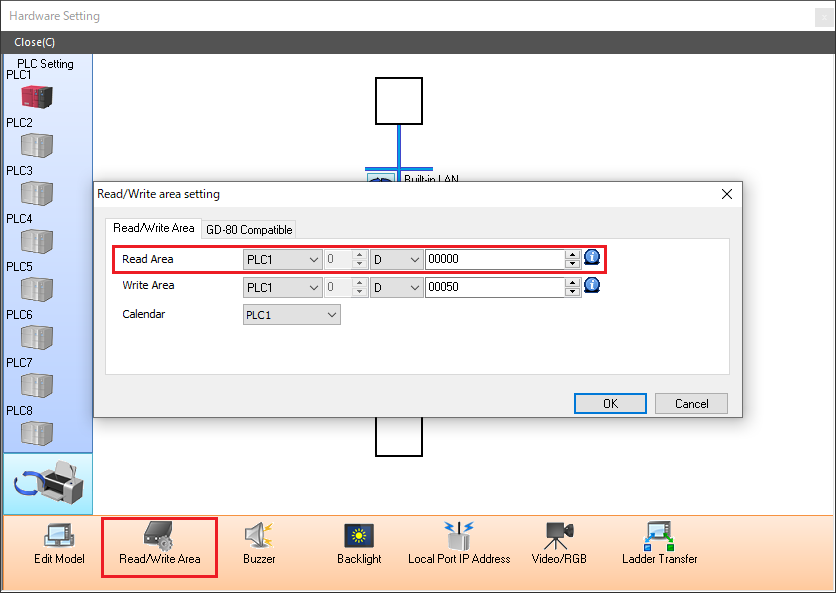
- [Read/Write Area] is displayed at [System Setting] → [Hardware Setting] in V-SFT.
Solution 1
Check the value of "n+2" in [Read Area] and change it to the value of an existing screen number.
If the device memory of [Read Area] is unknown, check the following locations.
The screen number value can be checked in V-SFT and in Local mode on the V10/V9 series unit.
Locations to check
Checking in V-SFT
- [System Setting] → [Hardware Setting] → [Read/Write Area] → [Read Area] in V-SFT
Example) In the above screenshot, since the value of "n+2" in [Read Area] is "D00002", check the value of "D00002" on the PLC and change it to the value of an existing screen number if necessary.
* If the [GD-80 Compatible Read/Write Area] checkbox is selected in the [GD-80 Compatible] tab window, check the lower 8 bits of the device memory for "n+1" in [Read Area].
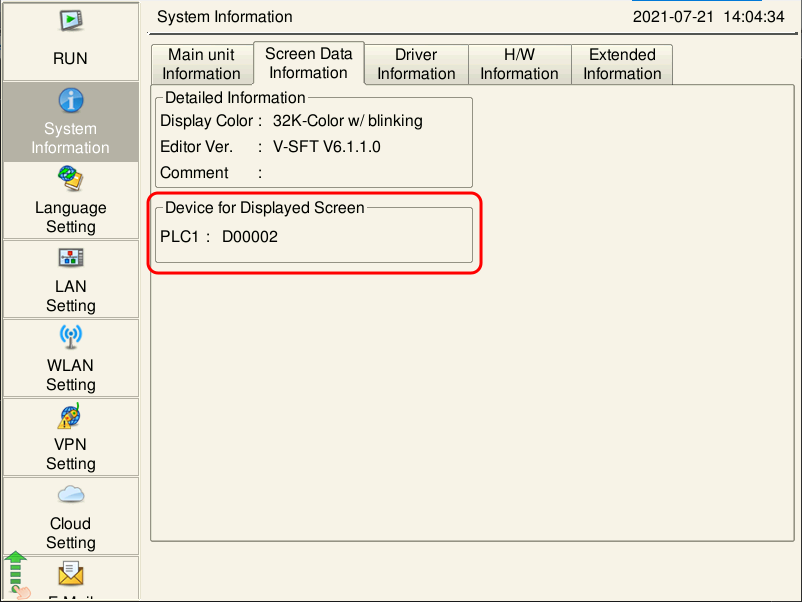
Checking in Local mode on the V10/V9 series unit
- Local mode [System Information] → [Screen Data Information]
Screen Command Memory (= "n+2" in [Read Area])
* For more information on how to change to Local mode, click here.
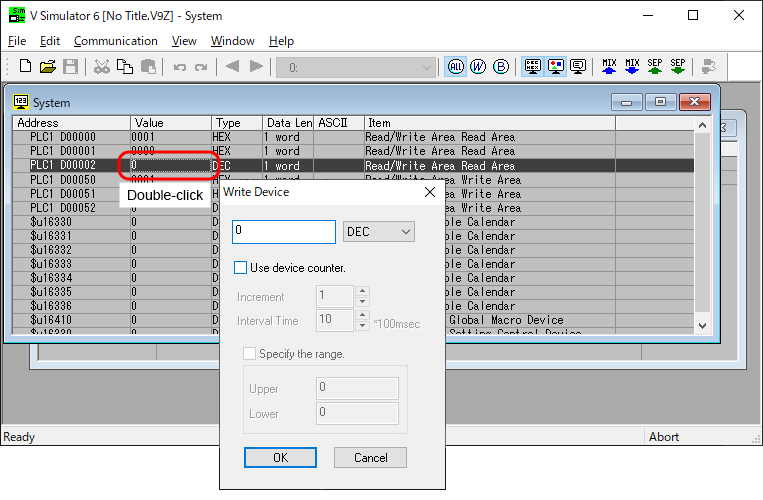
If "Screen No. Error" is displayed when the emulator starts
Double-click the value of "n+2" in [Read Area] displayed in the [System] window of the simulator and change it to the value of an existing screen number.
Next, press the [Retry] switch on the emulator.
Solution 2
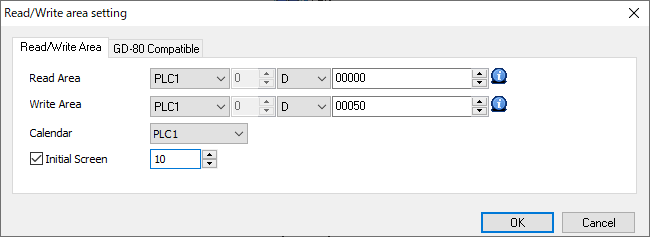
Set the initial screen.
* For V9, available with V-SFT Ver. 6.1.1.0 or later and V9 program Ver. 2.300 or later.
Setting location
[System Setting] → [Hardware Setting] → [Read/Write Area] → [Read Area] in V-SFT
Select the [Initial Screen] checkbox and set the initial screen number.